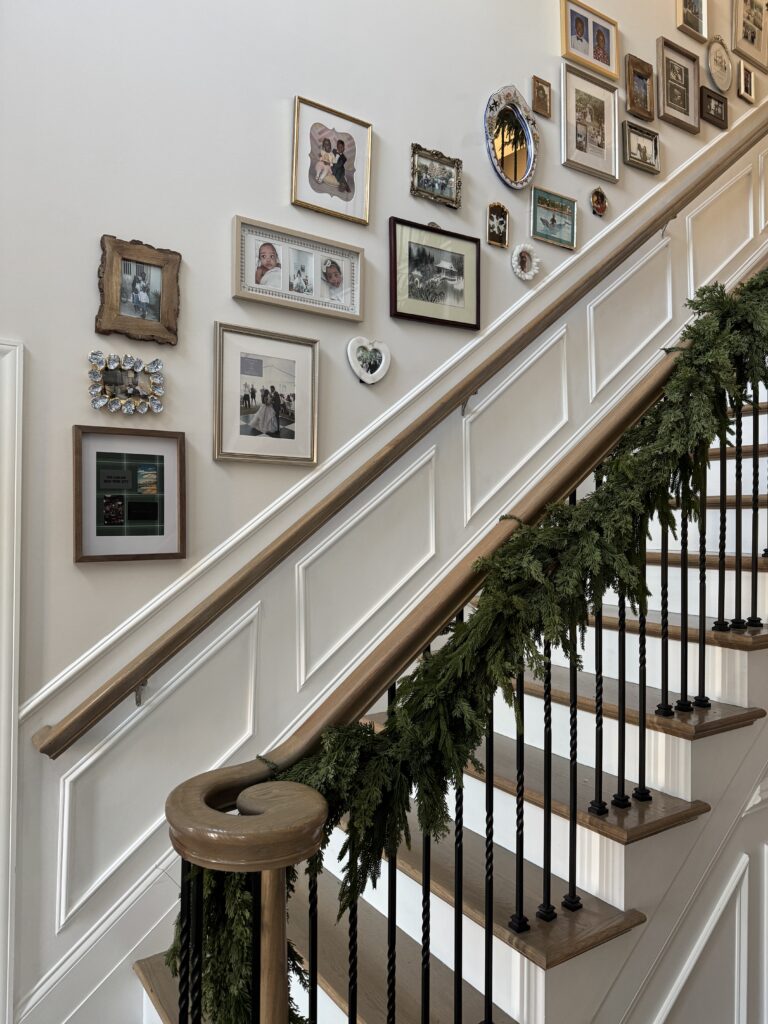
This has to be one of my favorite home updates! You guys, we’re getting better at this! I feel like adding the trim and molding made this space look so professional. This is exactly what the space needed. Shoutout to Rob!
I’m going to break this down step by step with everything we did to complete this project. However, my main advice is measure, measure, measure, even if you think you measured correctly, measure again!
Part 1: Trim & Molding
Step one:
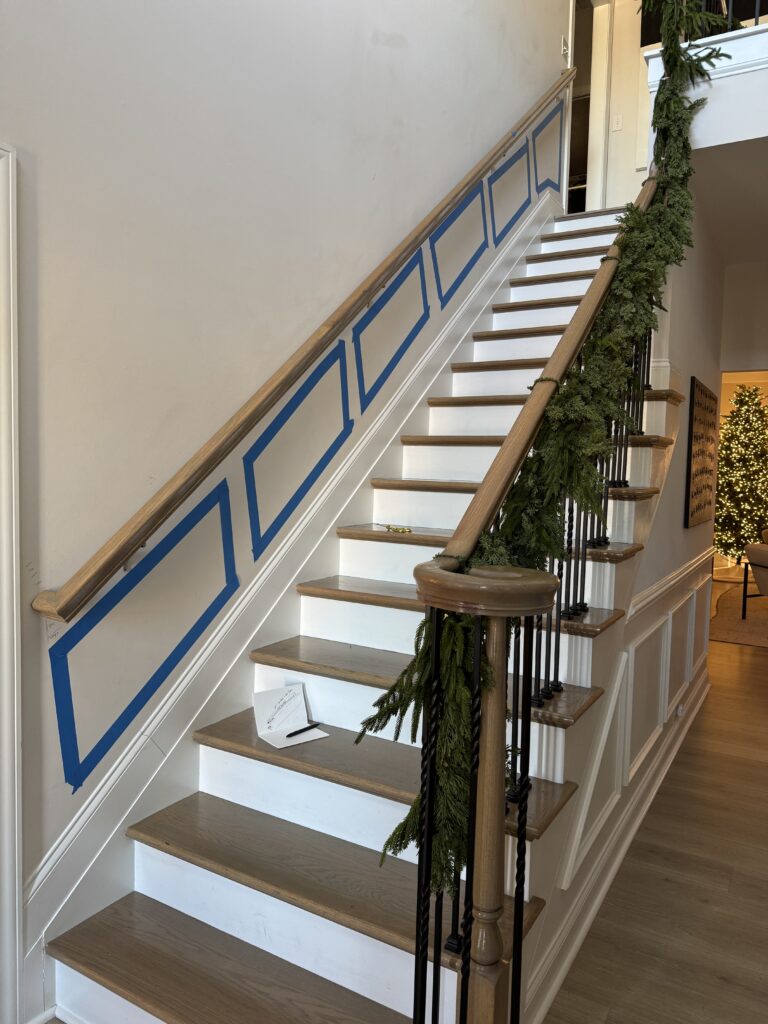
You guessed it, measure your wall from door frame door frame. Our length was 205″ total. Then we divided that number by 6 equal parts (each box plus space in-between each box). Next we measured the bottom half of the wall where the banister and trim boxing goes.
 Step two:
We’re still prepping by adding blue painters tape in the shape and size of each box. This wasn’t perfect but it gave us a visual of what the wall would look like and see if our measurements were correct.
 Step three:
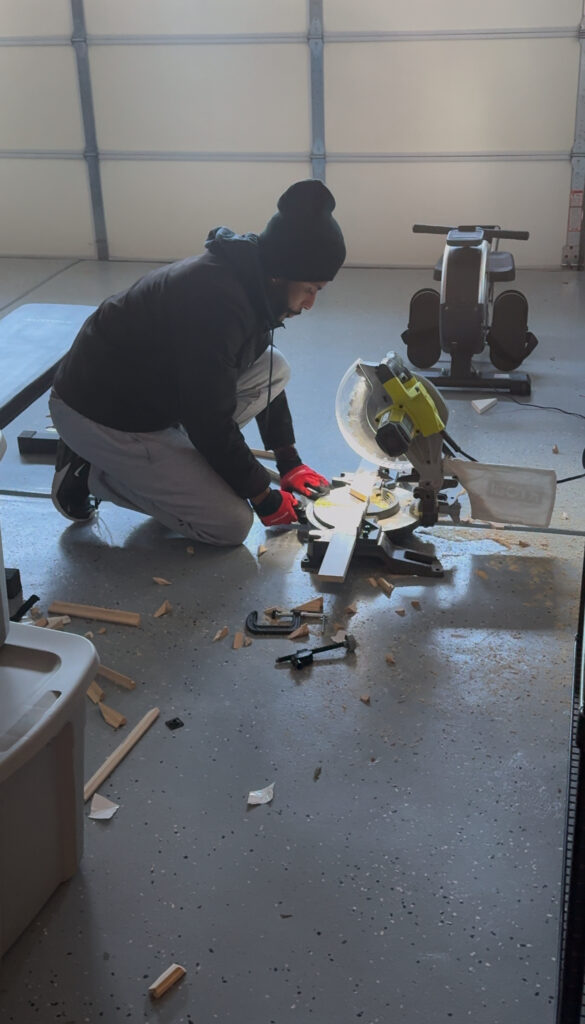
Head to Lowes and purchase trim. we bought four of the 12ft size for each box and then two 12ft pieces of trim for above the banister. We also bought an angle finder, mitersaw, caulking, and paint.
Step four:
Rob used his angle finder to sort of trace the angle to match the trim on the stairs. We basically followed the bottom trim and banister to make sure the boxes were perfectly centered.
 Step five:
Once Rob had the angles and measured like 18 times he cut each trim piece. This took a few tries, and by a few I mean this is the hardest part because all pieces have to perfectly add up to 360 degrees since they are all connecting.
![]()
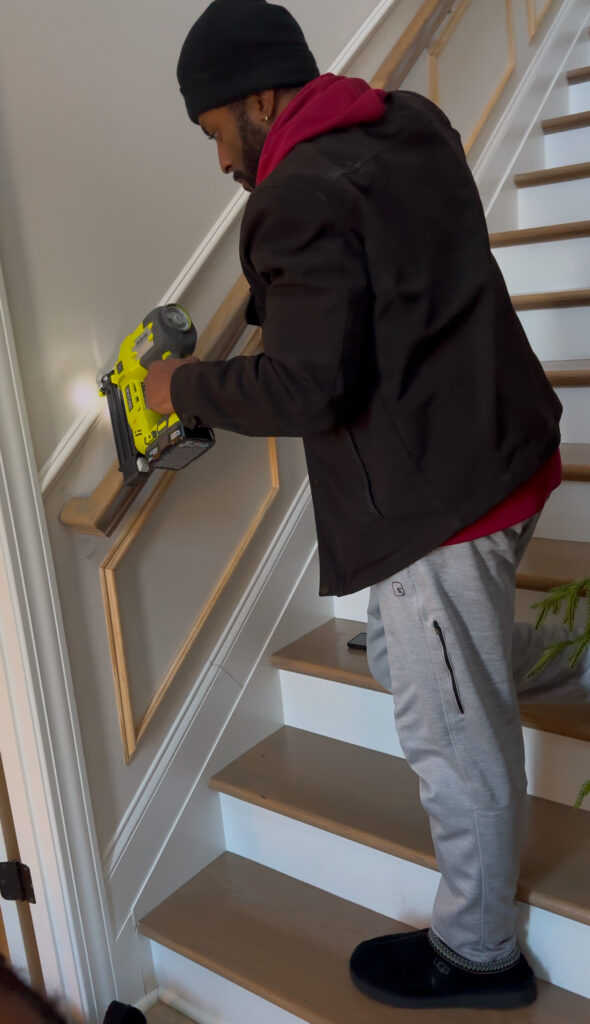 Step six:
Once each piece of trim was cut perfectly, Rob used his nail gun to attach each piece to the wall. He repeated this process six more times and then we added the final trim piece above e the banister.
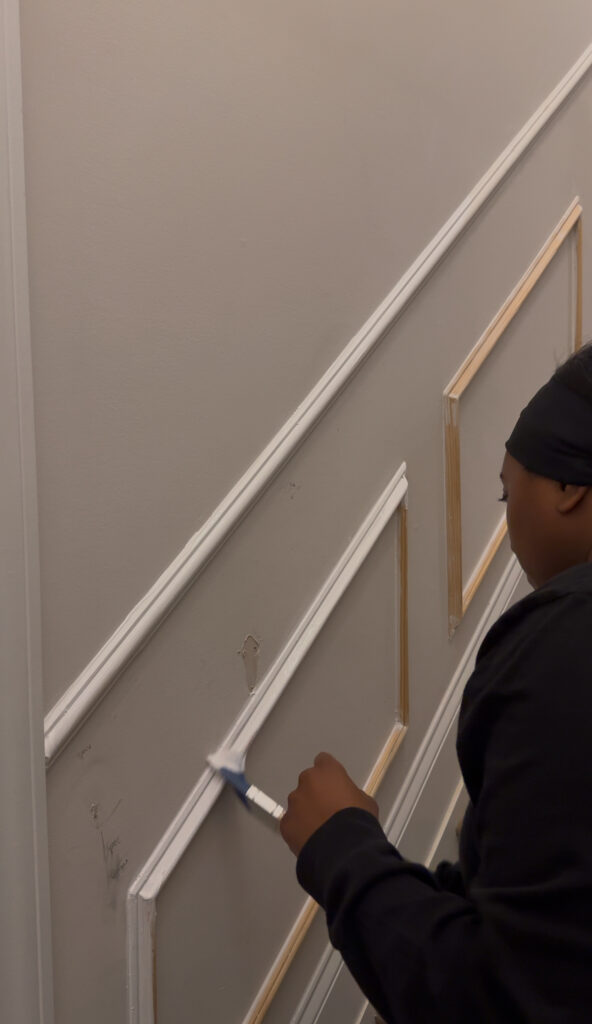 Step seven:
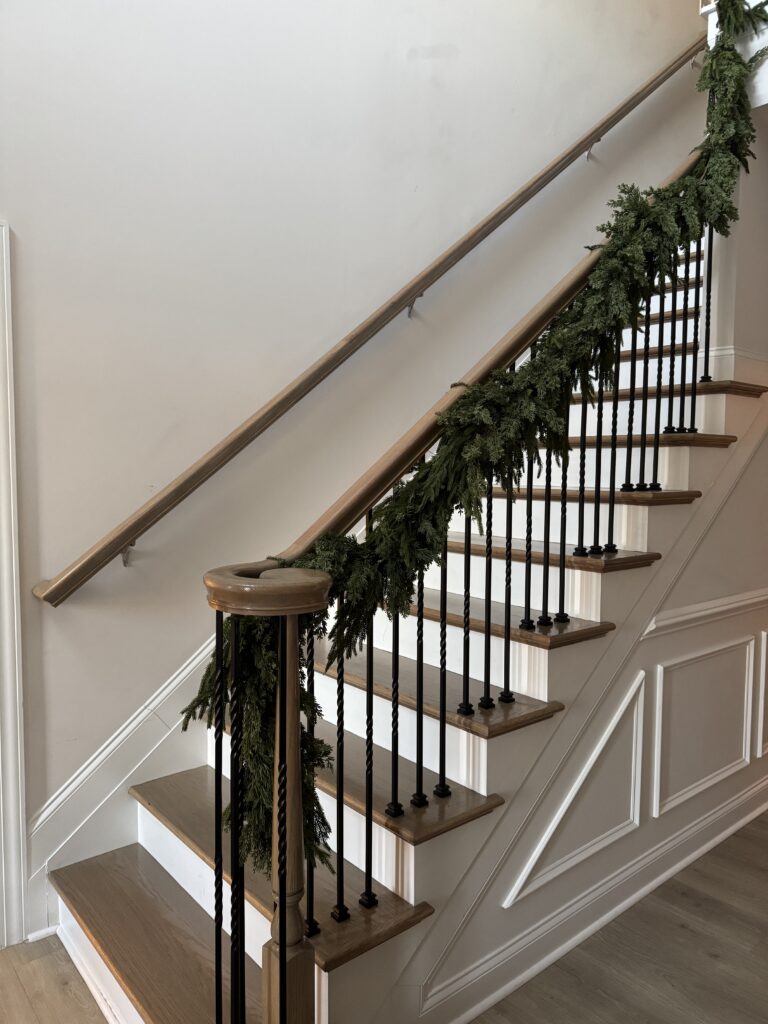
Now that everything was attached to the wall, the fun part started! First we caulked each trim piece. Then took down the banister to start painting. Quick note, we started and finished our boxes under the banister.
 Step eight:
We painted the wall a whiter color than the wall just to add a little contrast. Then we put the banister back up once the paint was dry.
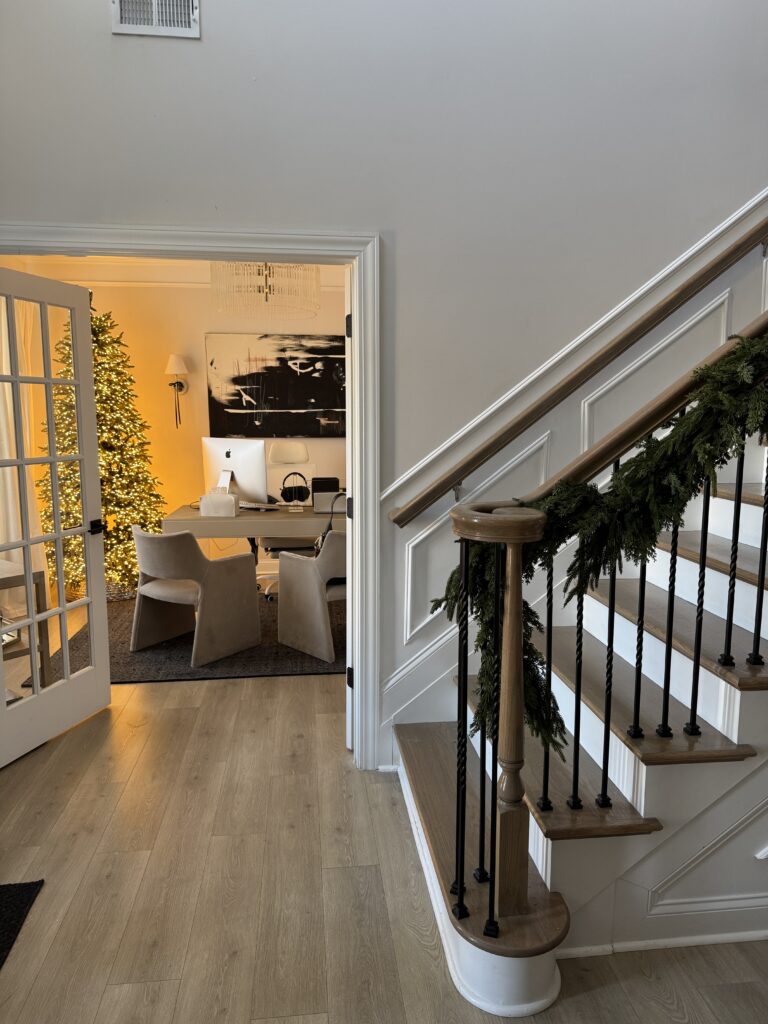
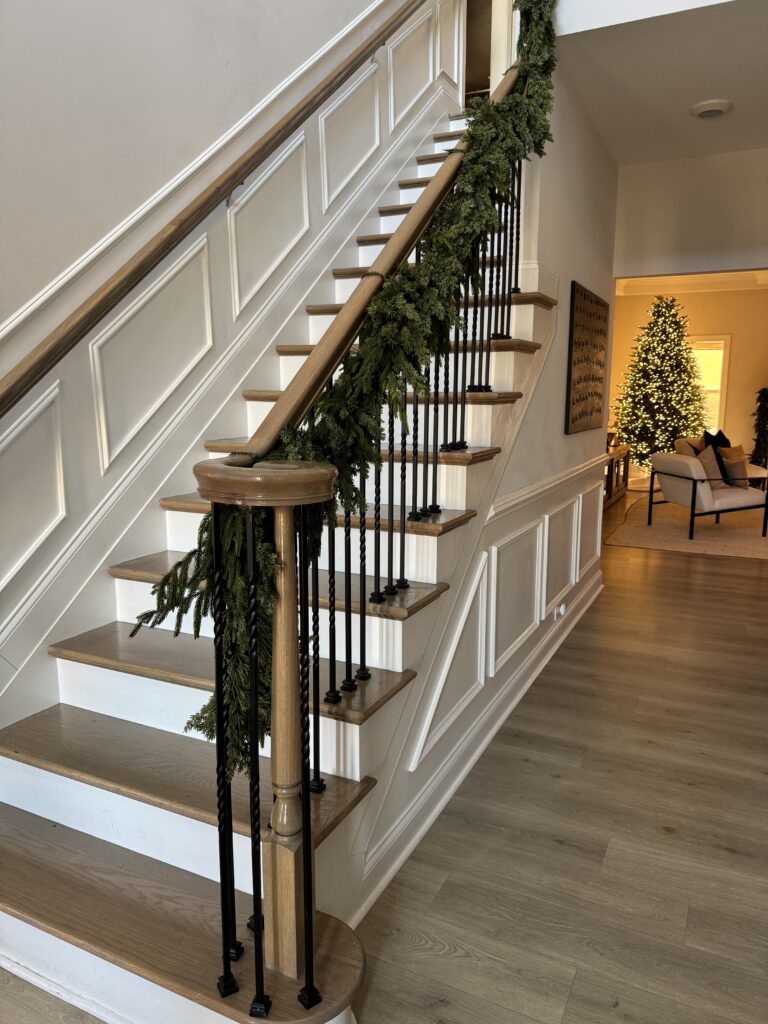 I LOVE IT! It looks like it was always supposed. to be there. It’s the perfect addition to our home. I love that it matches the trim we had next to the stairs at the bottom now. We also have trim in our dining room across the hall and everything really compliments one another. Here are the exact measurements we used:
-each box is: 29 3/8” x 17”
-inside angles: 50 degrees x 130 degrees
-trim above the banister: 205”
-paint color: valspar- ultra white in semi gloss finish
Part 2: Gallery Wall
Ok I could have stopped here and been happy but I wanted to add more personality and make it feel like ours! So I knew it was time to add frames on the wall. This also took a lot of prep but once we got started it was so easy.
Step 1:
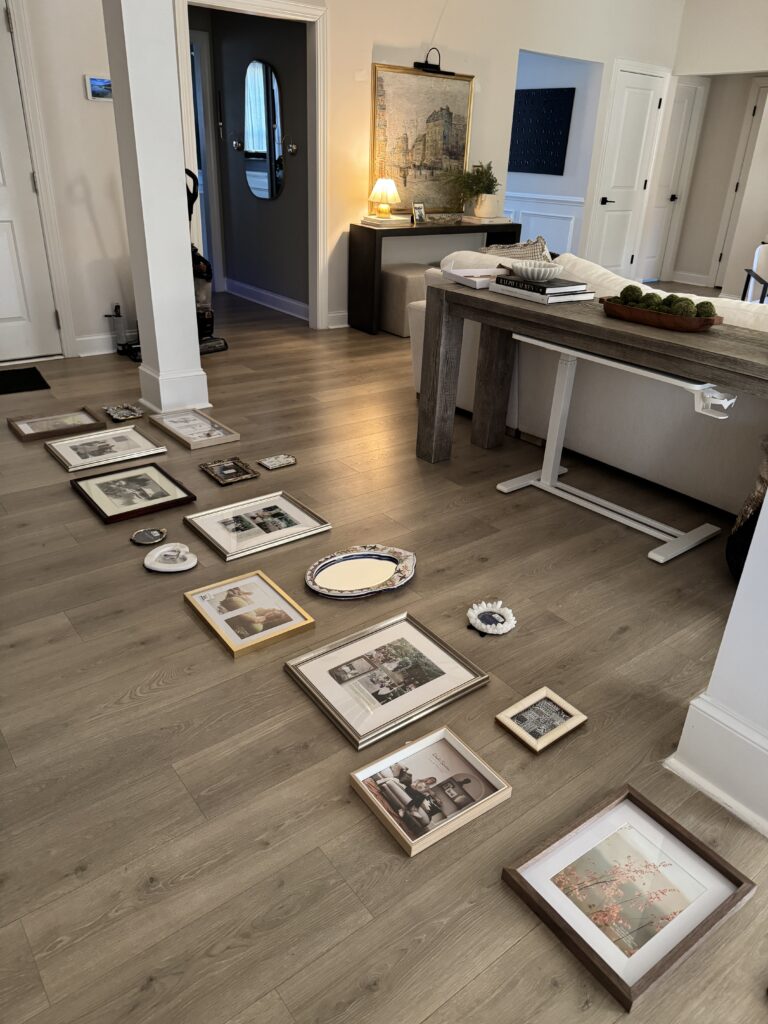
I decided to get a collection tin of different frames and form a gallery wall on the floor to map everything out. This made it easy to visualize which frames I wanted next to each other.
 Step 2:
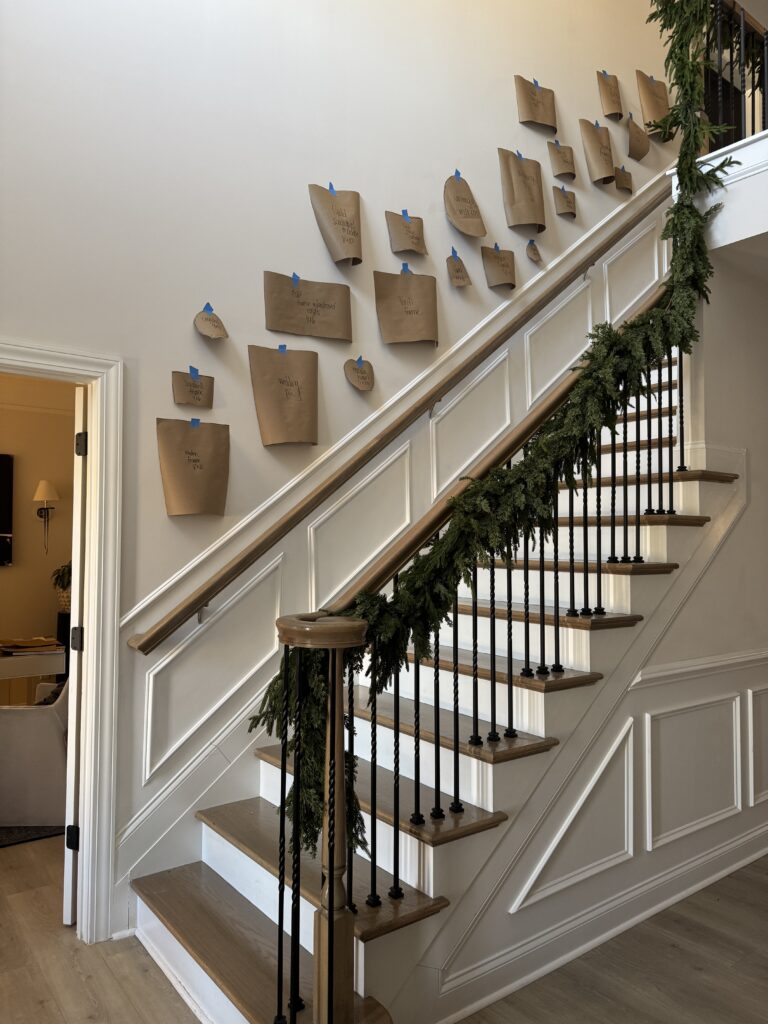
Next, I rolled out butcher paper, trace each frame and cut the tracings out. I labeled each one so I would know exactly where each frame was going, especially since Rob was going to be the one hanging each frame, I wanted us to be on the same page. Then I used that blue painters tape to tape all the tracings on the wall.
 Step 3:
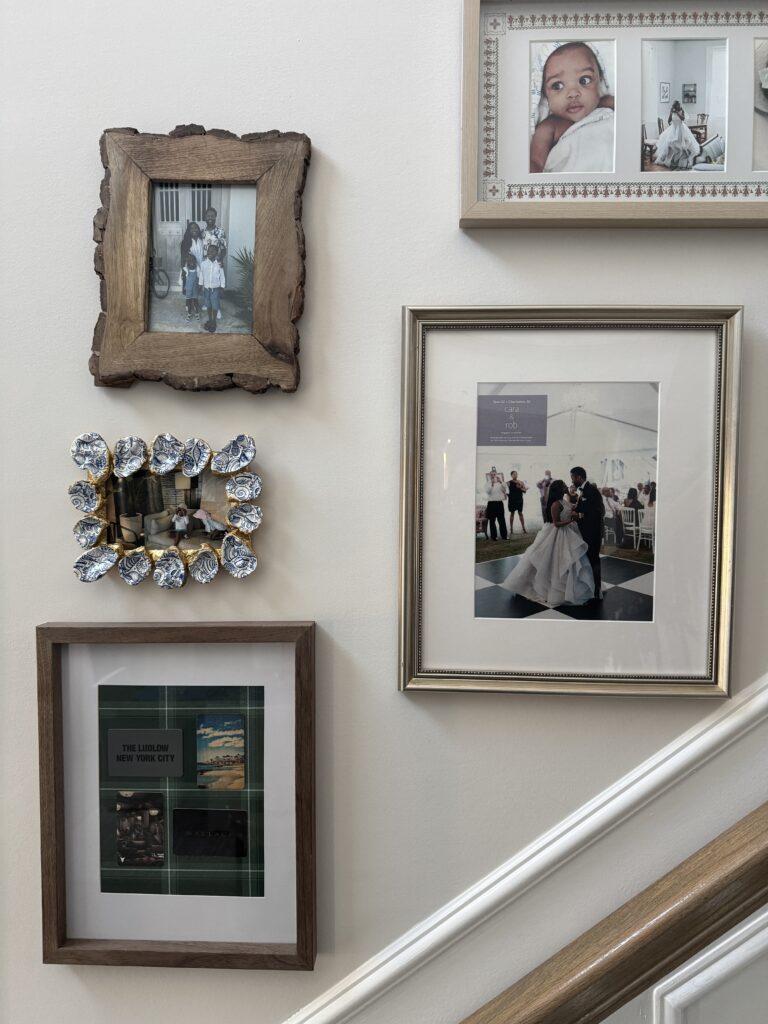
Rob used this frame hanging tool to level and mark where to hammer each nail. From there it was just hanging each frame or adding hooks on the back of a few frames, then hanging them.
This made such a huge impact, I really don’t think I could love it more! You can shop all of our supplies by clicking this link, this one, and this too! You have to let me know what you think of this epic transformation.